


Hey yo! In this post we are going to be creating a game with basic web design skills. All you need is basic knowledge of html, css and JavaScript. The game we are making is the popular 8 Puzzle Game. It is made of 9 tiles with 8 of them filled up with contents and the last one is empty. To solve the puzzle, the player will have to rearrange the tiles.
Open up your favorite text editor, I am using vscode and create the following files:
Now we create a div container with an unordered list having 9 list elements.
/index.html
<!DOCTYPE html>
<html lang="en">

<head>
    <meta charset="UTF-8">
    <meta name="viewport" content="width=device-width, initial-scale=1.0">
    <meta http-equiv="X-UA-Compatible" content="ie=edge">
    <link rel="stylesheet" href="css/style.css">
    <title>Sliding Tile Puzzle</title>
</head>

<body>
    <div id="container">
        <ul>
            <li></li>
            <li></li>
            <li></li>
            <li></li>
            <li></li>
            <li></li>
            <li></li>
            <li></li>
            <li></li>
        </ul>
    </div>

</body>
<script src="js/script.js"></script>

</html>
Now, let's add some styling. First we remove default padding and margin by selecting every element on the page by using the *.
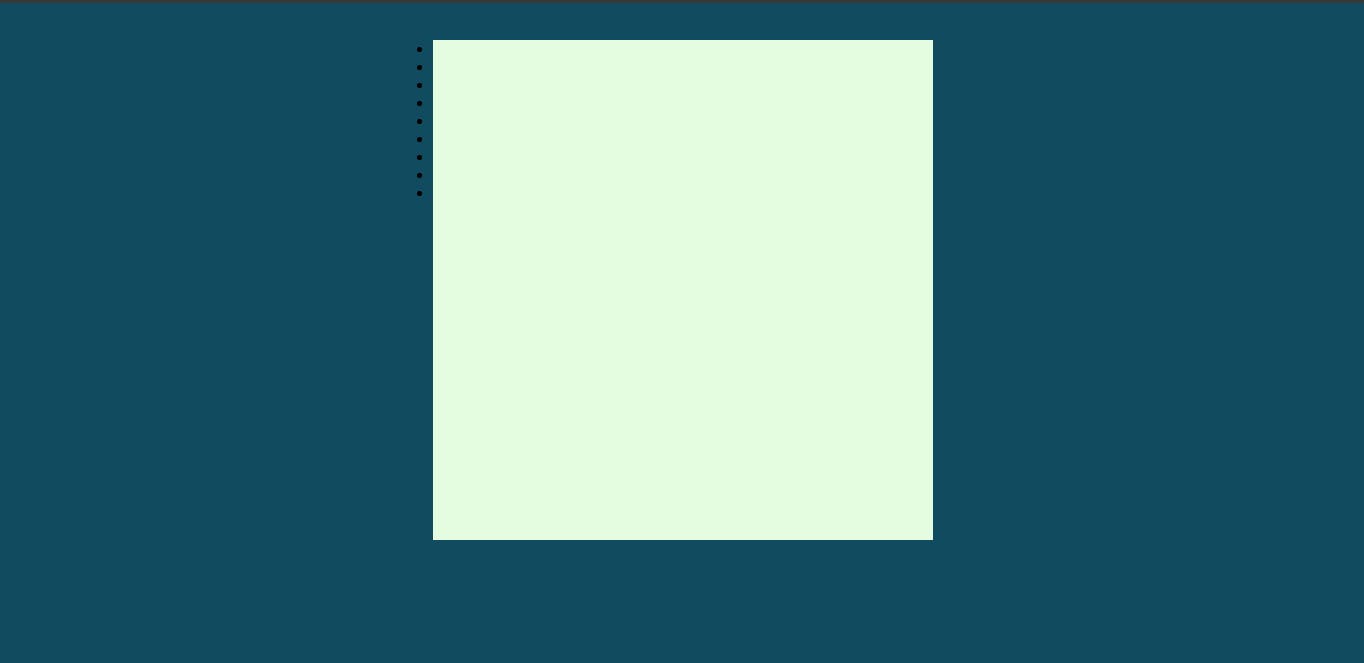
I also made the body a flex container so that we can use flexbox to style the page. The container div is given a height and width of 500px and a nice background that goes along with the body's background.
This line margin: 10px auto; centers container div by giving it a 10px margin at the top and bottom and an "automatic" (equal) margin on the left and right.
/css/style.css
* {
    padding: 0;
    margin: 0;
    box-sizing: border-box;
}

body {
    display: flex;
    background-color: #114B5F;
    text-align: center;
    flex-direction: column;
    padding-top: 2%;

}

#container {
    width: 500px;
    height: 500px;
    background: #E4FDE1;
    margin: 10px auto;
}
Preview index.html in your favorite browser, you should have this too:
Now, let's style the list items. I will make the ul a flex container too and space the list items evenly:
/css/style.css
* {
    padding: 0;
    margin: 0;
    box-sizing: border-box;
}

body {
    display: flex;
    background-color: #114B5F;
    text-align: center;
    flex-direction: column;
    padding-top: 2%;

}

#container {
    width: 500px;
    height: 500px;
    background: #E4FDE1;
    margin: 10px auto;
}

ul {
    display: flex;
    flex-wrap: wrap;
    list-style-type: none;
    justify-content: space-evenly;
    font-family: 'Audiowide';
    color: #E4FDE1;
}
ul li {
    background: #456990;
    width: 30%;
    height: 150px;
    border: 1px solid #028090;
    margin-top: 10px;
    text-align: center;
    font-size: 2rem;
    padding-top: 3rem;
}
Preview the index.html again, you should have something like this:
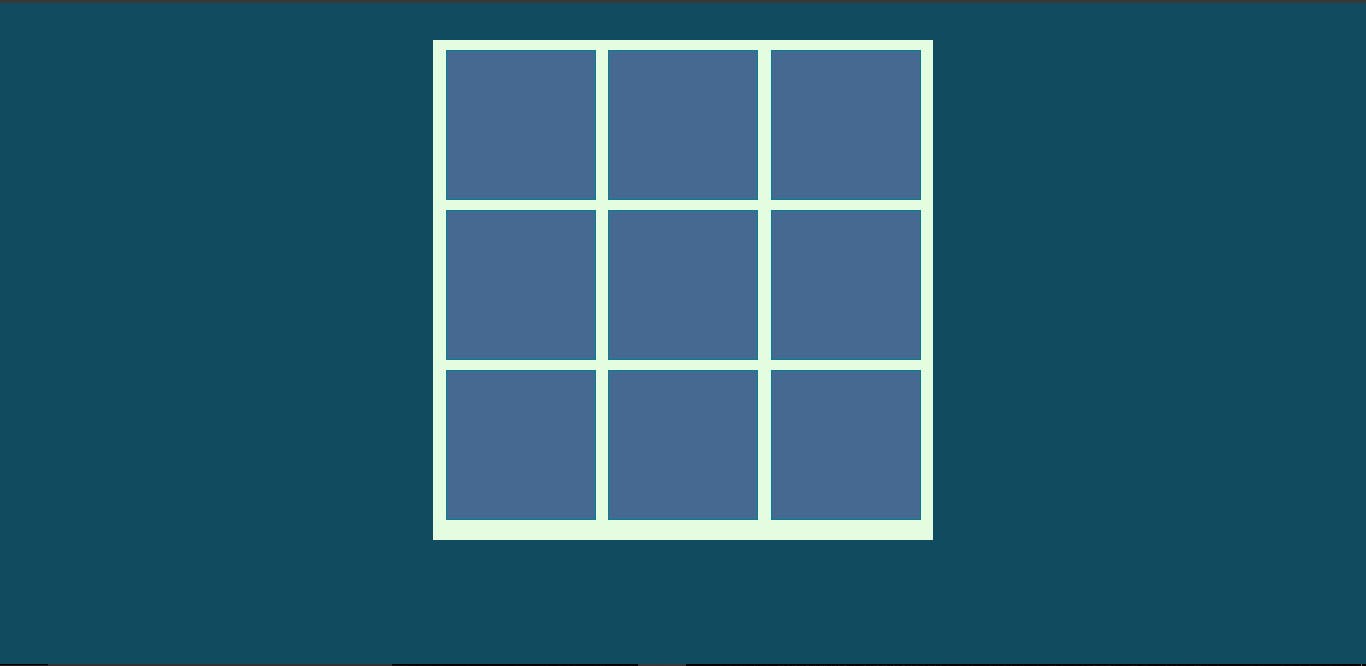
Nice.
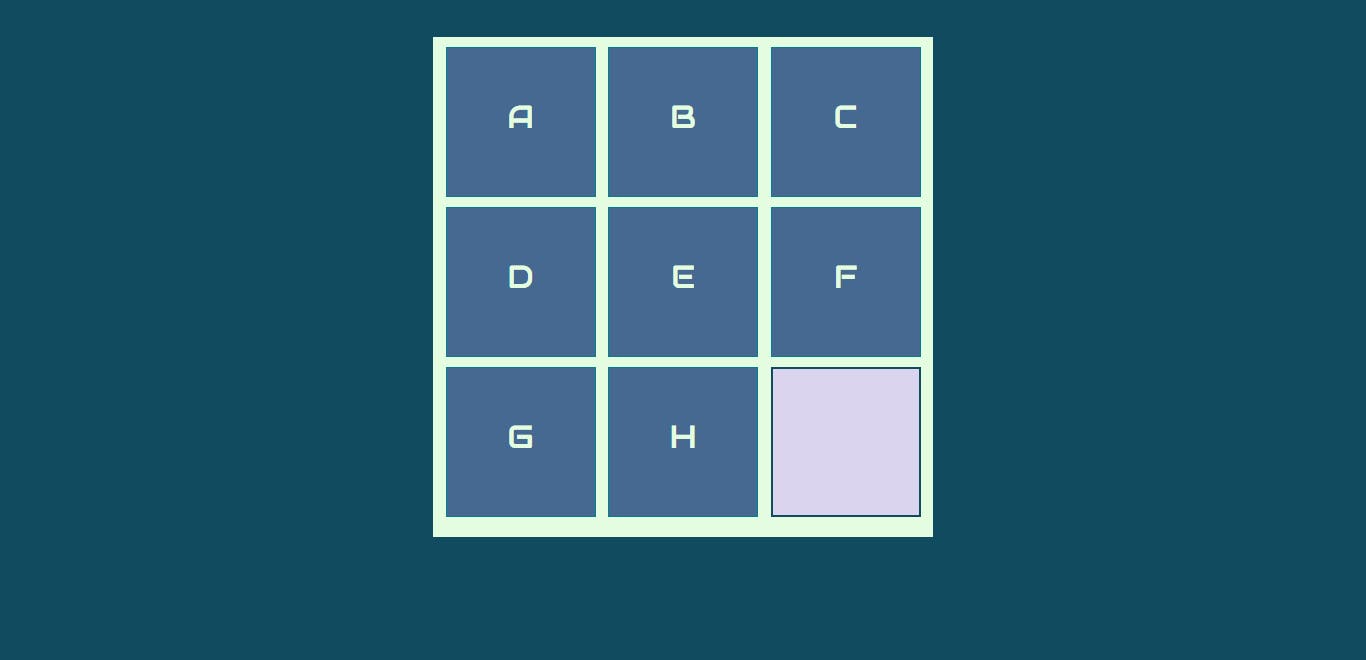
In the 8 tile sliding puzzle, the 9th tile should be empty so we will create a class that styles the empty tile. Before then, let's give the list items contents, update index.html to have the following content (I've included the link for the Audiowide font);
/index.html
<!DOCTYPE html>
<html lang="en">

<head>
    <meta charset="UTF-8">
    <meta name="viewport" content="width=device-width, initial-scale=1.0">
    <meta http-equiv="X-UA-Compatible" content="ie=edge">
    <link rel="stylesheet" href="css/style.css">
    <link href='https://fonts.googleapis.com/css?family=Audiowide' rel='stylesheet'>
    <title>Sliding Tile Puzzle</title>
</head>

<body>
    <div id="container">
        <ul>
            <li>A</li>
            <li>B</li>
            <li>C</li>
            <li>D</li>
            <li>E</li>
            <li>F</li>
            <li>G</li>
            <li>H</li>
            <li class="empty"></li>
        </ul>
    </div>

</body>
<script src="js/script.js"></script>

</html>
Add the following to the style sheet to style the empty tile:
/css/style.css
...
.empty {
    background: #DAD4EF;
    border: 2px solid #114B5F;
}
...
Preview again:
Let's add a nice heading before the container:
/index.html
...
<body>
    <h1>Sliding Tile Puzzle</h1>
    <div id="container">
        <ul>
            <li>A</li>
            <li>B</li>
...
The following is the styles for the heading:
/css/style.css
h1 {
    color: #E4FDE1;
    font-family: 'Sofia';
    text-align: center;

}
I have included a link to the Sofia font in the head section:
/index.html
...
<link href='https://fonts.googleapis.com/css?family=Sofia' rel='stylesheet'>
    <link href='https://fonts.googleapis.com/css?family=Audiowide' rel='stylesheet'>
    <title>Sliding Tile Puzzle</title>
...
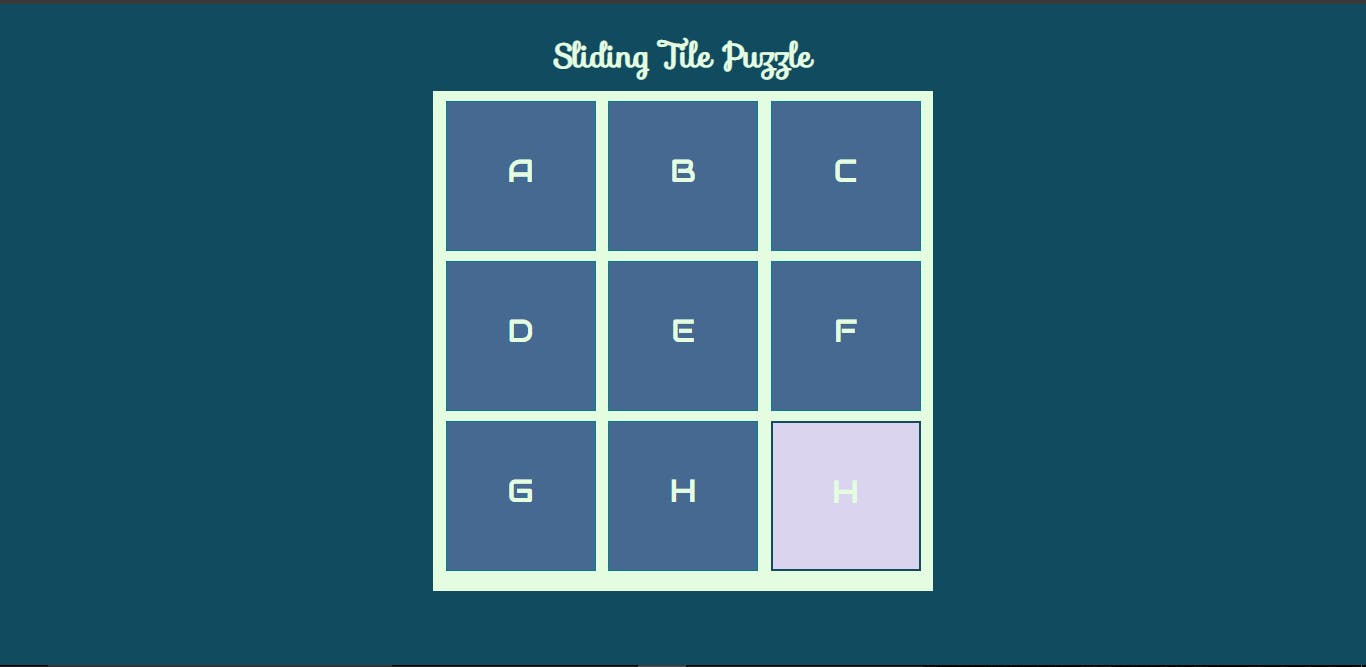
Preview the webpage again, you should have this:

The design of the game is complete, now let's give it life with JavaScript! Boomshakala!
Implementing functionality with JavaScript
To play the game, players will have to drag and drop tiles into available empty tiles. We are going to use the HTML Drag and Drop API .
This api let's make some elements draggable and some droppable, to do this we have to define drag and drop event handlers in the script file. Open up the script.js and fill it up with the following contents:
/js/script.js
const dragstart_handler = ev => {
    console.log("dragstart")
    ev.dataTransfer.setData("text/plain", ev.target.id)
    ev.dataTransfer.dropEffect = "move";
}
The dragstart_handler handles the event ev emitted when the user starts dragging. Because we will be transferring data while dragging, we get the data attached to the element and add it to the dataTransfer object, which is an object used to hold the data that is being dragged during a drag and drop operation.
Update the script.js with the following content:
/js/script.js/
...
const dragover_handler = ev => {
    console.log("dragOver");
    ev.preventDefault();
}

const drop_handler = ev => {
    console.log("drag")
    ev.preventDefault();
    // Get the id of the target and add the moved element to the target's DOM
    const data = ev.dataTransfer.getData("text/plain");
    ev.target.innerText = document.getElementById(data).innerText;
}

const dragend_handler = ev => {
  console.log("dragEnd");
  // Remove all of the drag data
  ev.dataTransfer.clearData();
}
The dragover_handler event handler is a simple function, the only important operation we perform with it is to call preventDefault() to prevent additional event processing for this event. We log out the event so that we can keep track of when it is fired.
In the drop_handler event handler, we get the data stored in the dataTransfer object and then we 'transfer' it to the element in which we are dropping unto (ev.target.innerText = document.getElementById(data).innerText;).
In the dragend_handler, we clear the data stored in the dataTransfer when the drag event ends.
Now, we need to update the index.html file, we will make the list item before the empty tile ('H' tile) draggable and make the empty tile droppable.
/index.html
...
<ul>
            <li>A</li>
            <li>B</li>
            <li>C</li>
            <li>D</li>
            <li>E</li>
            <li>F</li>
            <li>G</li>
            <li id="li8" draggable="true" ondragstart="dragstart_handler(event)" ondragend="dragend_handler(event)">H</li>
            <li id="li9" class="empty" ondrop="drop_handler(event);" ondragover="dragover_handler(event);"></li>
        </ul>
...
I gave both list items id's since in our event handlers, we had to get their content via their id's (see the dragstart_handler where we had ev.dataTransfer.setData("text/plain", ev.target.id)).
The 'H' tile is made draggable and I also set it's ondragstart and ondragend attributes to the relevant event handlers.
The empty tile is madedroppable and it now has attributes for ondrop and ondragover event handling.
Preview the webpage, drag and drop the 'H' tile unto the empty tile:
 The drag and drop feature works, but there is a problem. After dropping the content of the 'H' tile, we now have two tiles having 'H' in them. We will need to empty the first tile after the drop operation. Later, we will change the styling of the tiles after drag and drop operation.
To empty the source tile after a drop operation, update the script file as follows:
/js/script.js
...
const drop_handler = ev => {
    console.log("drag")
    ev.preventDefault();
    // Get the id of the target and add the moved element to the target's DOM
    const data = ev.dataTransfer.getData("text/plain");
    ev.target.innerText = document.getElementById(data).innerText;
    document.getElementById(data).innerText = "";
}
...
Moving all functionality to JavaScript
The tiles currently have contents that are defined in the html file, we will remove those contents and fill them in with JavaScript. Update the index.html file as follows:
/index.html
...
<ul>
            <li></li>
            <li></li>
            <li></li>
            <li></li>
            <li></li>
            <li></li>
            <li></li>
            <li></li>
            <li></li>
        </ul>
...
In script.js type in the following:
js/script.js
// select the list items
let ul = document.querySelectorAll('li');;
const letters= ["A", "B", "C", "D", "E", "F", "G", "H", ""]

// this function sets a unique id for each list item, in the form 'li0' to 'li8'
const setId = (items) => {
    for(let i = 0; i < items.length; i++) {
        items[i].setAttribute("id", `li${i}`)
    }
}

const fillGrid = (items, letters) => {
    items.forEach((item, i) => {
        item.innerText = letters[i];
    })
}

fillGrid(ul, letters);
First I got all the li items into a node list (something that is like an array) using the querySelectorAll. The letters array has the list of letters and the last item is the empty string, this is for the empty tile.
In the setId function, I set ids for each list item by calling the setAttribute() function on each of them, the id is made by concantenating the prefix li with the index of the for loop.
In the fillGrid function, I loop through all the li items while keeping track of their index, i, and I fill in each list item with an element from the letters array, accessing it with the index i.
If you preview the web page, you have the tiles filled up as we had earlier, but now we are doing that from JavaScript. Cool :) (Don't worry about the display of the empty tile yet)
Randomizing the tiles
The tiles are filled up with the contents of the letters which are from A-H, with the present script we will always have the same configuration of the tiles. What we want is that the tiles should be shuffled up so that we always get a random configuration that must then be rearranged to solve the puzzle.
Shuffle the letters arrays before filling in.
How can we write a function that will shuffle the array? The algorithm for this function is as follows
- Loop through the array
- For each index i in the loop, pick another random index j
- swap elements at index i and j
Stop!!! Try to implement this algorithm before seeing my implementation.
js/script.js
...
// shuffle the array
const shuffle = (arr) => {
    const copy = [...arr];
    // loop over the array
    for(let i = 0; i < copy.length; i++) {
        // for each index,i pick a random index j
        let j = parseInt(Math.random()*copy.length);
        // swap elements at i and j
        let temp = copy[i];
        copy[i] = copy[j];
        copy[j] = temp;
    }
    return copy;
 }
...
Did you come up with something similar?
Note that I made a copy of the array in the shuffle function before shuffling it, this makes sure that we do not change (a.k.a mutate) the passed in array but return a new shuffled one.
Now, update the fillGrid function to first shuffle the array before filling in the tiles:
/js/script.js
...
const fillGrid = (items, letters) => {
    let shuffled = shuffle(letters);

    items.forEach((item, i) => {
        item.innerText = shuffled[i];
    })
}
...
Now when you refresh the page, you get a new configuration of the tile each time. Boomshakala!!!
Setting Droppable and Dragabble Tiles
Now, we will write a function that will take in the list of li items, find the one whose content is empty and make it droppable.
We will also write a function that will make all the tiles on the page draggable, we will change this function later so that it's only tiles that are top, bottom, left and right of the empty tile that will be draggable.
Before these functions, we will create a setUp function, from where we will make all the function calls. Move all the function calls that we presently have into the setUp function.
/js/script
// select the list items
let ul = document.querySelectorAll('li');;
const letters= ["A", "B", "C", "D", "E", "F", "G", "H", ""]

function setUp() {
    fillGrid(ul, letters);
    setId(ul)
    // set up the droppable and dragabble contents
    setDroppable(ul) ;
    setDraggable(ul);

}

const state = {}
state.content = letters;

/**
 * setters
*/
const setDroppable = (items) => {
    items.forEach((item, i) => {
        if(!item.innerText) {
            item.setAttribute("ondrop", "drop_handler(event);");
            item.setAttribute("ondragover", "dragover_handler(event);");
            item.setAttribute("class", "empty");
        }
        return;
    })
}

const setDraggable = (items) => {
    items.forEach(item => {
            item.setAttribute("draggable", "true");
            item.setAttribute("ondragstart", "dragstart_handler(event)");
            item.setAttribute("ondragend", "dragend_handler(event)");
    })
}
...
Notice that I have created a state object that will hold the state of the game. Update the index.html file so that when the body loads, the setUp function is called:
/index.html
...
<body onload="setUp()">
    <h1>Sliding Tile Puzzle</h1>
...
If you preview the page, you will notice that you can drop tiles unto the empty tile but when you do, the tile is filled up but it's still styled as the empty tile and its the only tile that you can drop tiles.
We will now update the app so that, when an empty tile is dropped unto from a source tile, it becomes 'filled up' and it's no more droppable. Remember that we used the setAttribute(key, value) function to set an attribute, we will use the same function to remove the attribute, we will set the value of the attribute we want to remove to an empty string. We will then make the source tile droppable and empty:
/js/script.js
...
const drop_handler = ev => {
    console.log("drag")
    ev.preventDefault();
    // Get the id of the target and add the moved element to the target's DOM
    const data = ev.dataTransfer.getData("text/plain");
    ev.target.innerText = document.getElementById(data).innerText;

    // once dropped, unempty the cell :)
    ev.target.classList.remove("empty")
    // remove relevant attributes
    ev.target.setAttribute("ondrop", "");
    ev.target.setAttribute("ondragover", "");
    document.getElementById(data).innerText = "";
}

const dragend_handler = ev => {
  console.log("dragEnd");
  // Remove all of the drag data
  ev.dataTransfer.clearData();

  // set new droppable and draggable attributes
  setDroppable(document.querySelectorAll('li'));
  setDraggable(document.querySelectorAll('li'))
}
...
Test out the app now and you will find that everytime you drag and drop a tile, the source becomes an empty tile and the destination becomes filled up!. You will also notice that you can drag and drop tiles that are not adjacent to the empty tile, later we will fix this.
Getting the game state and dimension
Each time a player drag and drops a tile, the arrangement of the tiles changes, we want to keep track of this change in the state object. Let's create a function that gets the state. We will also make a function that will store the visual representation of the tiles as an array of arrays. Update the script file as follows:
/js/script.js
...
function setUp() {
    fillGrid(ul, letters);
    setId(ul)

    state.content = getState(ul);
    state.dimension = getDimension(state);

 // set up the droppable and dragabble contents
    setDroppable(ul) ;
    setDraggable(ul);
    console.log("The state dimension", state.dimension)

}

const state = {}
state.content = letters;


/**
 * Getters
 */
const getState = (items) => {
    const content = [];
    items.forEach((item, i) => {
        content.push(item.innerText)
    });
    return content;
}

const getDimension = (state) => {
    let j = 0;
    let arr = [];
    const {content} = state;
    for(let i = 0; i < 3; i++) {
        arr.push(content.slice(j, j+3));
        j+=3;
    }

    return arr;
}

/**
 * setters
*/
const setDroppable = (items) => {
    items.forEach((item, i) => {
        if(!item.innerText) {
            state.emptyCellIndex = i;
            item.setAttribute("ondrop", "drop_handler(event);");
            item.setAttribute("ondragover", "dragover_handler(event);");
            item.setAttribute("class", "empty");
        }
        return;
    })
}
...
The getDimension function loops through the content (which is an array of the letters with length 9) three times, each time it slices three contents and puts them in an array, this gives us an array of 3 arrays. The first array represents the first row of the game, the second array represents the second row and the third array represents the third row.
This means that we now have the game state stored in two formats: state.content stores the tiles in a linear sequence (1D array); state.dimension stores the tiles in a 2D array as its visual representation.
 state.content vs state.dimension
In the setUp function, I logged out the output of the getDimension function, you will see that it stores the visual representation of the game in a nice 2D array. Notice that I added a new line to the setDroppable function to store the index of the empty tile in the app state, state.emptyCellIndex = i; The index stored here is the index from the 1D linear array of li items.

Getting the empty cell
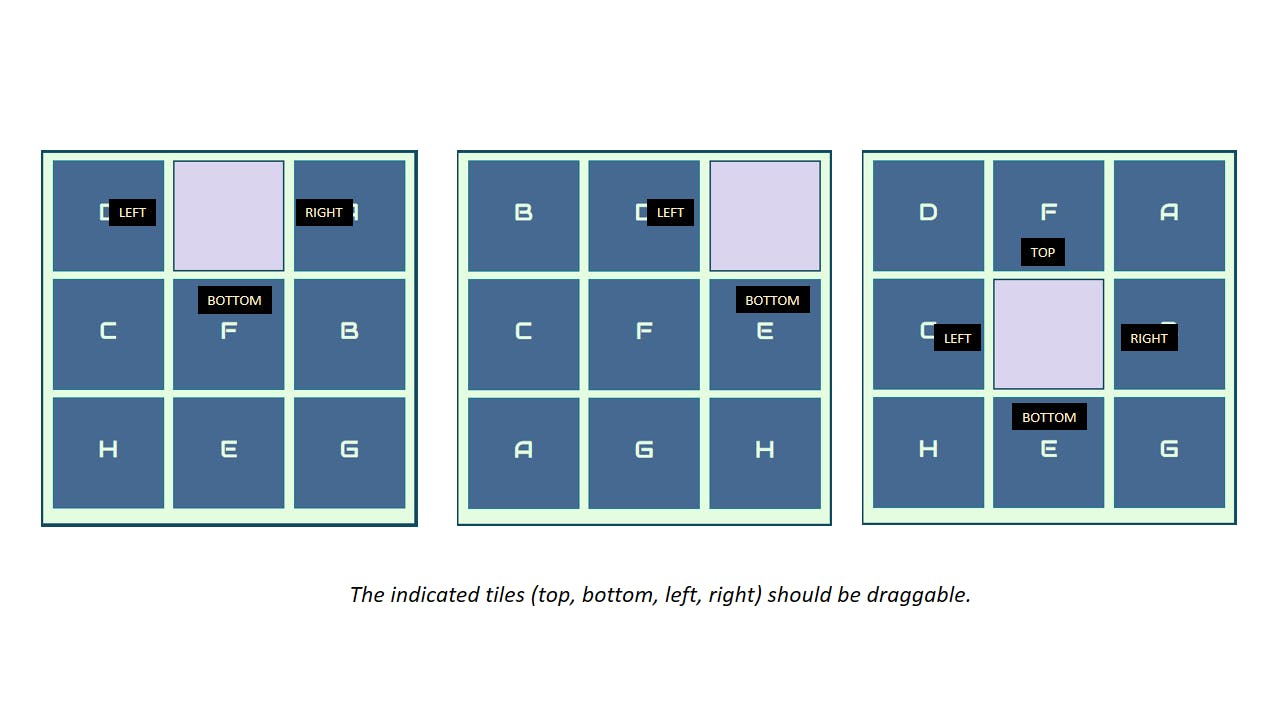
We need to get the empty cell so that we can make only its adjacent tiles dragabble. Presently we can drag any tile unto the empty tile, see the image below. In each picture only the dotted tiles (in red) should be draggable:

We will create a getEmptyCell function that will return the 2D positions of the empty cell from the state.dimension. We already have the index of the empty cell stored in the state.emptyCellIndex which stores the 1D index of the empty cell.
How to get the 2D positions from the 1D index
We will do some math in order to compute the 2D positions of the empty cell from the 1D index. The 2D representation of the game has 3 rows and 3 columns; it consist of 9 tiles in total. The state.emptyCellIndex contains the linear index of the empty cell, since indices of arrays start from 0, the actual cell number of the empty array will be state.emptyCellIndex+1.
To get the row in which this falls, we will divide the cell number by 3, (the number of cells in a row). We take the ceil of the result, this is the row number in which the empty falls.
Getting the column in which the empty cell falls is quite tricky; we multiply the emptyCellRow number by 3 and subract the emptyCellNumber from the result, we then subtract the total result from 3.
Create a getEmptyCell function right after the getState function:
/js/script.js
...
const getEmptyCell = () => {
    const emptyCellNumber = state.emptyCellIndex+1;
    const emptyCellRow = Math.ceil(emptyCellNumber/3);
    const emptyCellCol = 3 - (3 * emptyCellRow - emptyCellNumber);
    // emptyCellRow holds the actual row number the empty tile falls into in a 9-cell grid
    // the array index will be one less than its value. Same goes for emptyCellCol
    return [emptyCellRow-1, emptyCellCol-1]
}
Making only adjacent tiles to empty cell dragabble
Now that we have a way to get the position of the empty cell, we can make only adjacent cells around it draggable. An empty cell can have a cell above, below , to the left or to the right of it that should be draggable. An empty cell may sometimes not have all 4 adjacent sides:
 How can we get the indices of the tiles adjacent to the empty tile? Let's take an example:

In the example above, the empty tile is on row 1 and col 1. The tiles on the left and right of it are both on the same row 1. The left tile is on col 0 ( row of empty tile - 1). The right tile is on col 2 (row of empty tile + 1). Similarly, the top and bottom tiles are on the same col 1 as the empty tile but on row 0 and row 2 respectively.
Let's update the setDraggable function:
/js/script.js
...
const setDraggable = (items) => {
    const [row, col] = getEmptyCell();

    let left, right, top, bottom = null;
    if(state.dimension[row][col-1]) left = state.dimension[row][col-1];
    if(state.dimension[row][col+1]) right = state.dimension[row][col+1];

    if(state.dimension[row-1] != undefined) top = state.dimension[row-1][col];
    if(state.dimension[row+1] != undefined) bottom = state.dimension[row+1][col];


    // make its right and left dragabble
    items.forEach(item => {
        if(item.innerText == top ||
            item.innerText == bottom ||
            item.innerText == right ||
            item.innerText == left) {
                item.setAttribute("draggable", "true");
                item.setAttribute("ondragstart", "dragstart_handler(event)");
                item.setAttribute("ondragend", "dragend_handler(event)")
            }

    })
}
...
Now, we get the adjacent tiles and make only those tiles dragbble. Test the game, you will notice that only the tiles adjacent to the empty tile are draggable. If you tested the game enough, you will notice that some tiles that have been made draggable when an empty tile was adjacent to them are still draggable after the empty file as been filled up.
How can we fix this? Simple: We need to update the app state and dimension every time we complete a drag and drop. Update the script file as follows:
/js/script.js
...
const drop_handler = ev => {
    console.log("drag")
    ev.preventDefault();
    // Get the id of the target and add the moved element to the target's DOM
    const data = ev.dataTransfer.getData("text/plain");
    ev.target.innerText = document.getElementById(data).innerText;

    // once dropped, unempty the cell :)
    ev.target.classList.remove("empty")
    ev.target.setAttribute("ondrop", "");
    ev.target.setAttribute("ondragover", "");
    document.getElementById(data).innerText = "";

    // get new state after dropping
    state.content = getState(ul);
    // get new dimention from the state after dropping
    state.dimension = getDimension(state);
}
...
There is still a subtle problem that is similar to the one we just solved. All the tiles that we made droppable when they were empty are still droppable even when they become filled up, we will now create a function (called removeDroppable) that will make a tile undroppable once it is filled up.
We will call this function in the dragend_handler function. Create a removeDroppable function after the setDroppable function and call it in the dragend_handler function as follows:
/js/script.js
...
const removeDroppable = (items) => {
    items.forEach((item) => {
        item.setAttribute("ondrop", "");
        item.setAttribute("ondragover", "");
        item.setAttribute("draggable", "false");
        item.setAttribute("ondragstart", "");
        item.setAttribute("ondragend", "");
    })
}

...

const dragend_handler = ev => {
  console.log("dragEnd");
  // Remove all of the drag data
  ev.dataTransfer.clearData();
  // remove all droppable attributes
  removeDroppable(document.querySelectorAll('li'));

  // set new droppable and draggable attributes
  setDroppable(document.querySelectorAll('li'));
  setDraggable(document.querySelectorAll('li'))
}
...
Unto the final steps
The game is almost complete, we now have to check if the user has arranged the tiles in the right order. Before then, there is an important property of 8-puzzle tile that we need to consider: it's not all configurations that are solvable.
Since we are randomizing the tiles, it's possible to get a configuration that is not solvable.How do we tell if a given instance of the puzzle is solvable?
A given instance of 8 puzzle is solvable only if the number of inversions is an even number in the configuration.
What's an inversion? An inversion occurs when a pair of tiles are in the reverse order as they should be in the correct configuration. For example, given the following configuration:
[
 ["A", "B", "C"],
 ["D", "", "E"],
 ["H", "F",  "G"]
]
There are two inversions in the configuration (H, F) and (H, G), since the number of inversions is two (an even number), this configuration will be solvable. To know if a given configuration is solvable, we count the number of inversions. How do we do that?
Simple: We pick each element and compare it with other elements after it, if the first element is 'greater' than the second element, then we have encountered an inversion. Open up the script.js file and create an inSolvable function right before the fillGrid function, also we we will update the fillGrid function to only fill the tiles if the generated configuration is solvable:
/js/script.js
...
const isSolvable = (arr) => {
    let number_of_inv = 0;
    // get the number of inversions
    for(let i =0; i<arr.length; i++){
        // i picks the first element
        for(let j = i+1; j < arr.length; j++) {
            // check that an element exist at index i and j, then check that element at i > at j
            if((arr[i] && arr[j]) && arr[i] > arr[j]) number_of_inv++;
        }
    }
    // if the number of inversions is even
    // the puzzle is solvable
    return (number_of_inv % 2 == 0);
}

const fillGrid = (items, letters) => {
    let shuffled = shuffle(letters);
    // shuffle the letters arraay until there is a combination that is solvable
    while(!isSolvable(shuffled)) {
        shuffled = shuffle(letters);
    }

    items.forEach((item, i) => {
        item.innerText = shuffled[i];
    })
}
...
Now we are sure that the configuration will always be solvable!
Checking for the correct solution
We now have to check when a player has solved the puzzle. We will create an isCorrect function that will take in state.content and letters arrays, convert both of them to a string, and then compare both strings to check if they are equal. Create the function after the isSolvable function:
/js/script.js
...
const isCorrect = (solution, content) => {
    if(JSON.stringify(solution) == JSON.stringify(content)) return true;
    return false;
}
...
When do we check for the solution? At the end of every drag event, so we have to update the dragend_handler function:
...
const dragend_handler = ev => {
  console.log("dragEnd");
  // Remove all of the drag data
  ev.dataTransfer.clearData();
  // remove all droppable attributes
  removeDroppable(document.querySelectorAll('li'));
  // set new droppable and draggable attributes
  setDroppable(document.querySelectorAll('li'));
  setDraggable(document.querySelectorAll('li'))

  // if correct
  if(isCorrect(letters, state.content)) {
      console.log("Smart Yo!. You win");
  }
}
...
Try the game out, when the arrangement is correct, the message is logged to the console. We wouldn't want players of our game to check the console to know when they solve the puzzle. We will be creating a modal that will pop up when the puzzle as been solved, I will move a bit fast, the codes are easy to comprehend:
/index.html
...
<body onload="setUp()">
    <h1>Sliding Tile Puzzle</h1>
    <div id="modal" class="hide">
        <div id="header"><button id="closeBtn" onclick="hideModal()">x</button></div>
        <h1 id="message">You won!</h1>
    </div>
    <div id="container">
...
css/style.css
...
/* Modal styles */
#modal {
    width: 40%;
    height: 300px;
    background: #DE5360;
    position: absolute;
    top: 30%;
    left: 50%;
    transform: translateX(-50%);
    font-family: 'Sofia';
}

#modal #message {
    color: #FDE1E3;
    margin: 0;
    font-size: 4rem;
}

.hide {
    display: none;
}
#modal #header {
    text-align: right;
    padding: 5px 10px;
}
#modal #header button {
    padding: 10px;
    border: 0px;
    background: #456990;
    color: #E4FDE1;
    cursor: pointer;
}
/js/script.js
const dragend_handler = ev => {
  console.log("dragEnd");
  // Remove all of the drag data
  ev.dataTransfer.clearData();
  // remove all droppable attributes
  removeDroppable(document.querySelectorAll('li'));

  // set new droppable and draggable attributes
  setDroppable(document.querySelectorAll('li'));
  setDraggable(document.querySelectorAll('li'))

    // if correct
    if(isCorrect(letters, state.content)) {
        showModal();
    }
}

const showModal = () => {
    document.getElementById('message').innerText = "You Won!";
    document.getElementById('modal').classList.remove("hide");

}

const hideModal = () => {
    document.getElementById('modal').classList.add("hide");
}
Try out the game now:
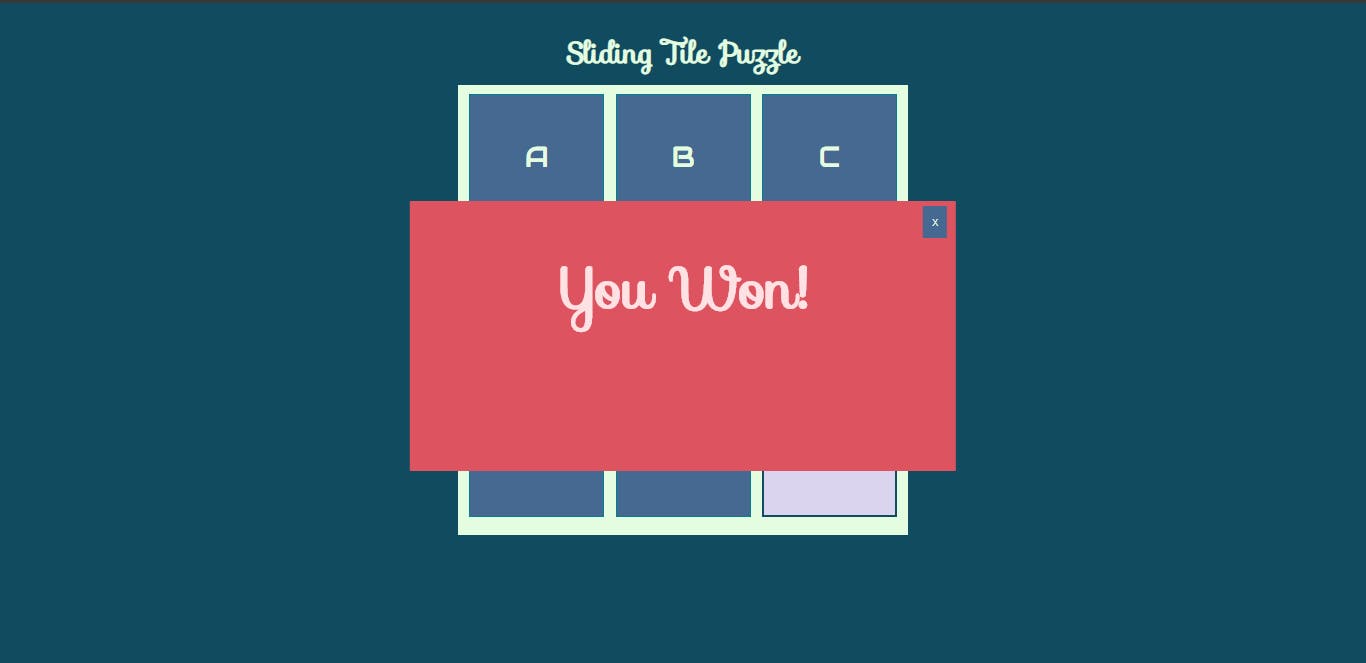
Congratulations!!!
 Wow! It's been a long ride, I hope you have learnt some new stuff and had fun while building the 8 puzzle game. The complete code is on github here .
Share this post if you find it helpful and you can follow me on twitter @solathecoder for more awesome tech posts.
Until we meet again, happy coding!